Level One PT Exercises
by Greg Booth of Neurosport
(Please check with your surgeon prior to starting any exercise program)
This exercise program is for an individual who has received hip resurfacing surgery. Many patients who have received this surgery require individualized training and exercise program development. It is the goal of this program to give the patient general information regarding appropriate exercises to do in relation to the number of days since they received their surgery.
The following exercise program is divided into three post-operative phases: Level One, Level Two and Level Three. These exercises may overlap from one phase to another and a patient might have to go back to the preceding phase if they are experiencing increased pain.
There is a strong emphasis on improving the patient’s coordination and joint function with each exercise. With this in mind, please do each exercise slowly and stop if you have any unexpected pain in your hip or back.
Level One Exercises
Level One exercises are for patients within the first six weeks after their surgery. These exercises emphasize increasing the mobility of your operative hip while following any hip precautions your surgeon has given you. There is also a strong emphasis on improving the coordination of the muscles that move the hip joint and stabilize the low back. These exercises should be performed pain free.
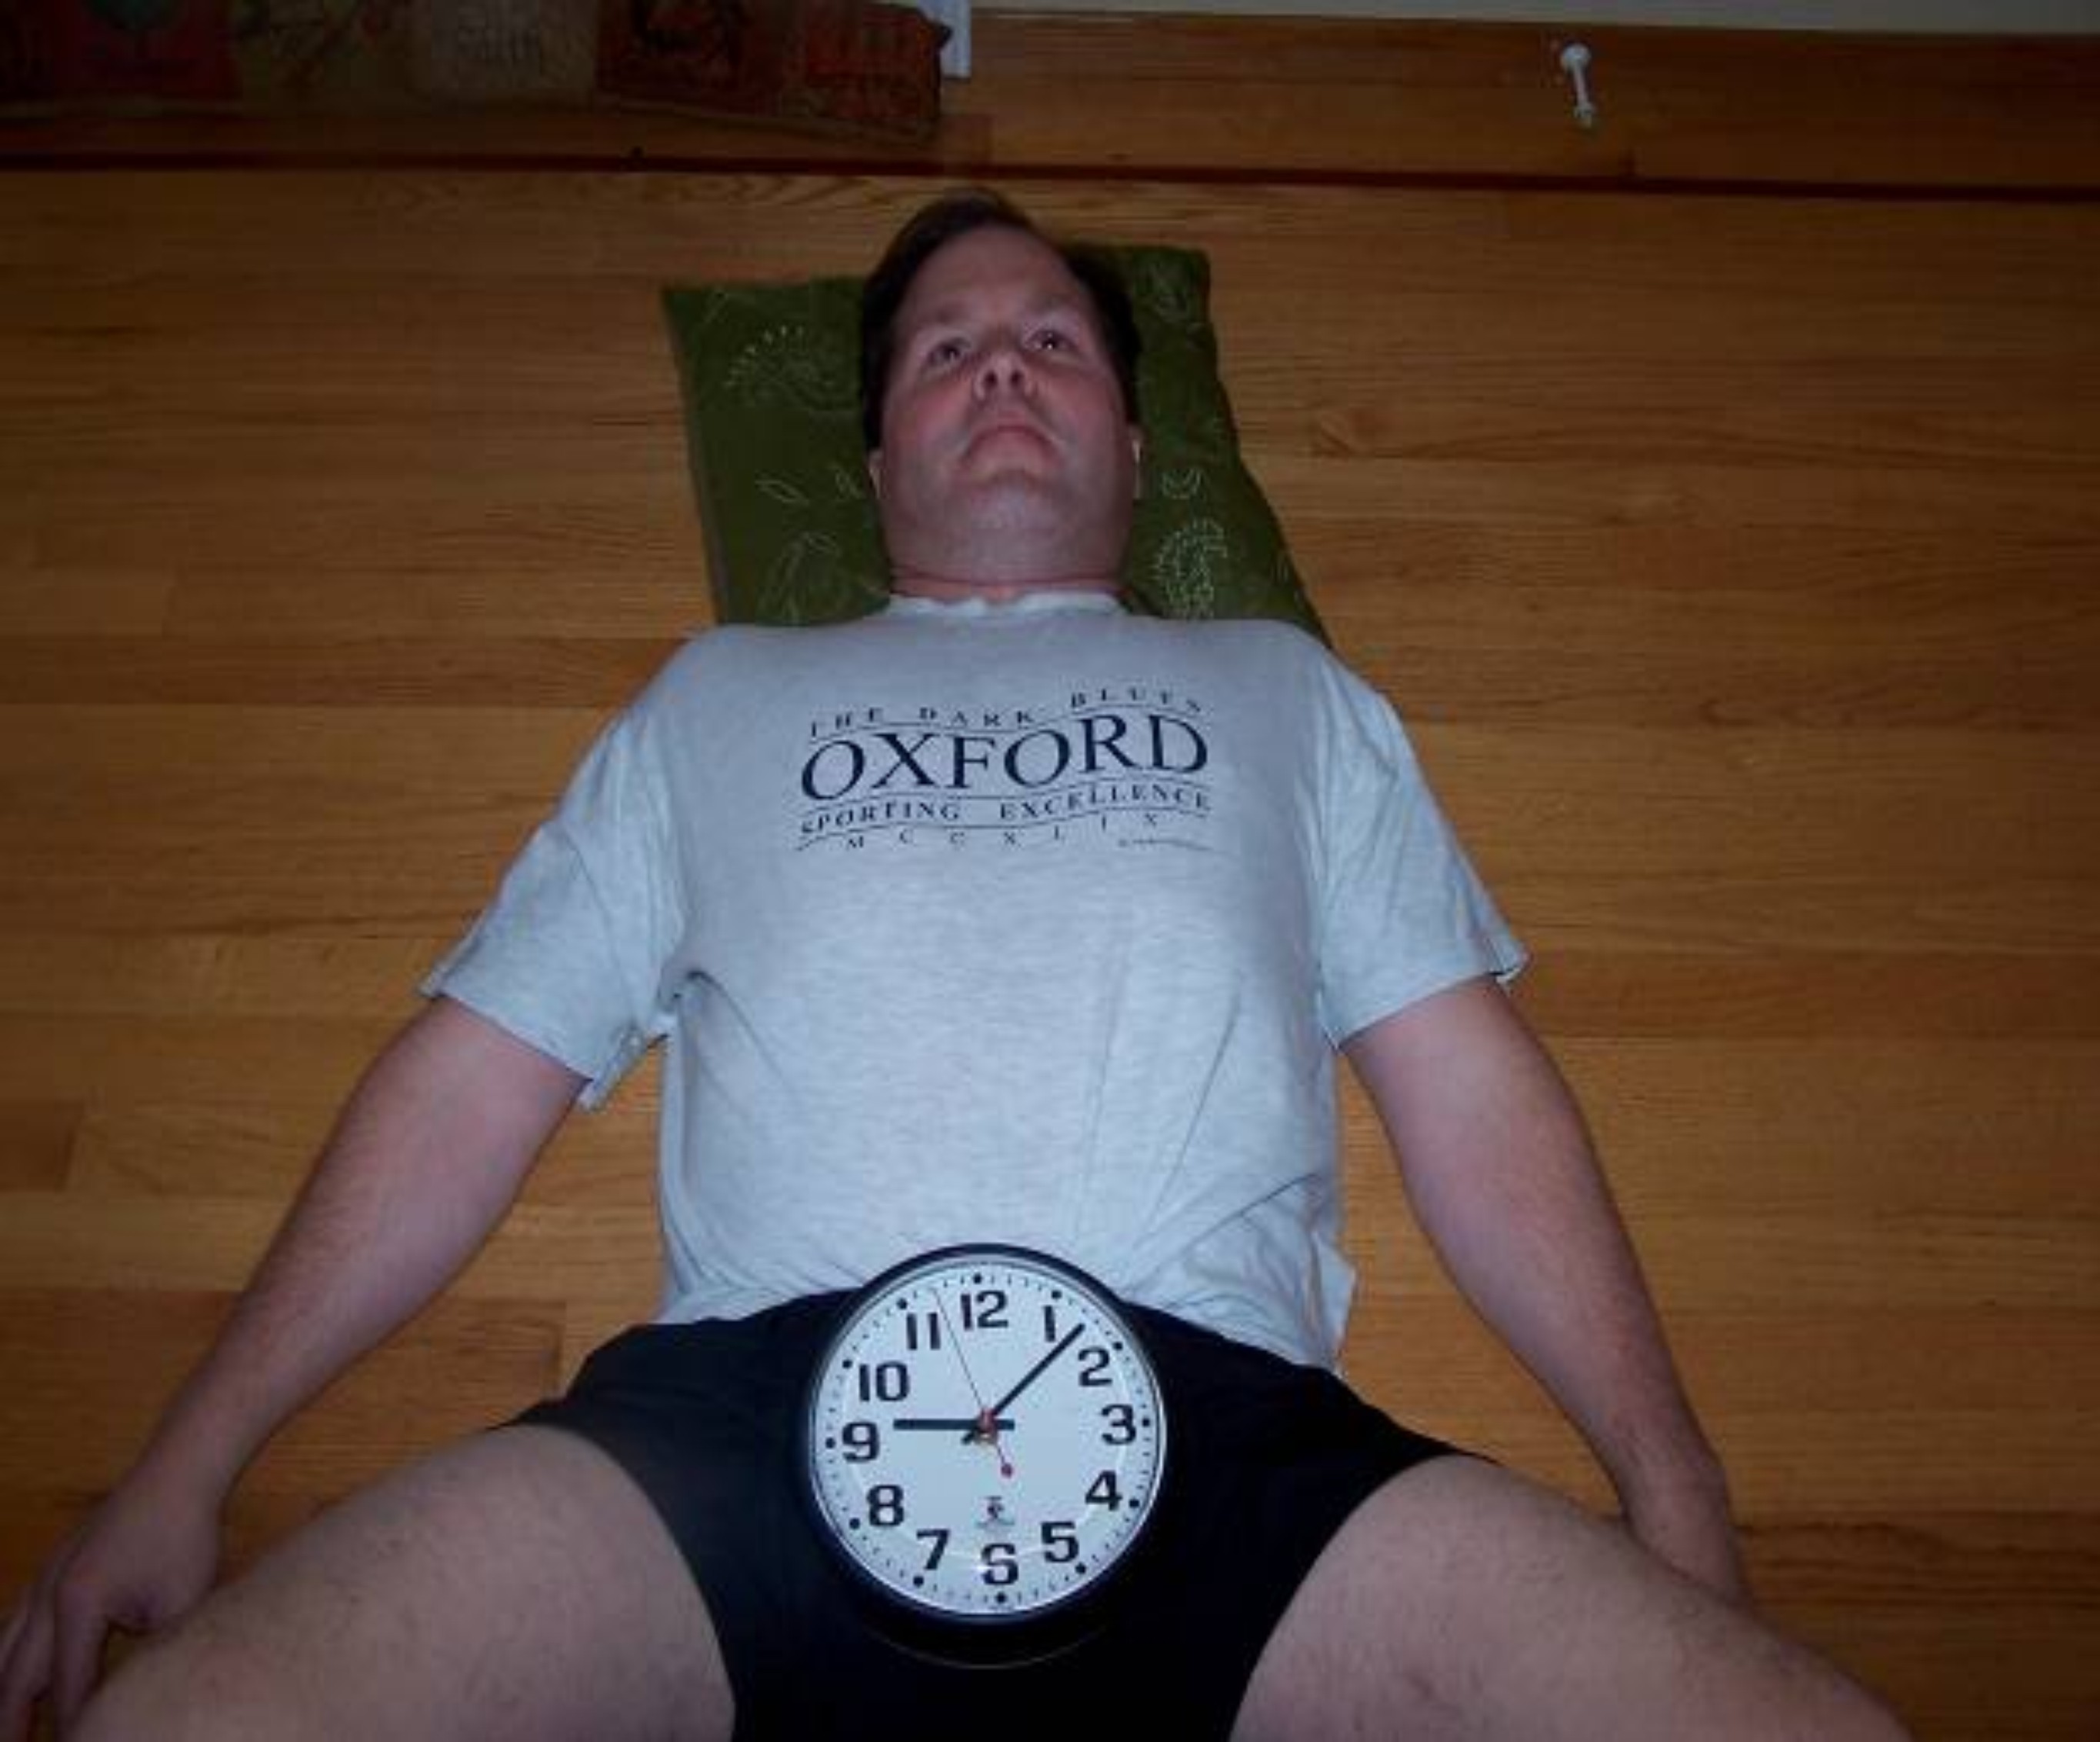
Pelvic Clocking
This exercise can help improve the mobility of your hip and low back by moving the pelvis on the femoral head. Lie on your back with your knees bent as shown in the picture. Tighten your bottom muscles, push your feet into the floor, and tilt your pelvis back to a 12 o’clock position. Your low back should now be touching the surface you are lying on. Now relax your bottom muscles and arch your back to the 6 o’clock position. Repeat this motion for 1 to 2 minutes.
To increase the level of difficulty with this exercise, you can move the pelvis towards different numbers on the clock always returning to neutral after each number. ( ie. 1 o’clock to neutral, 2 o’clock to neutral etc.)
Ankle Pumps
This is a good exercise to decrease the swelling in your legs. Lie on your back with your legs supported by pillows. Have one pillow under the thigh by your bottom. Have two pillows under your knees and have three pillows under your lower legs and feet. This will position your feet above your heart and allow the fluid to drain from your legs toward your heart. In this position, your can move your feet back and forth to activate your leg muscles and help pump the swelling out of your legs and drain it back toward your heart. You can use this position to rest in. The ankle pumps can be performed for 1 to 2 minutes for every 15 minutes you lie on your back. Do not sleep overnight in this position. (Photo coming soon)
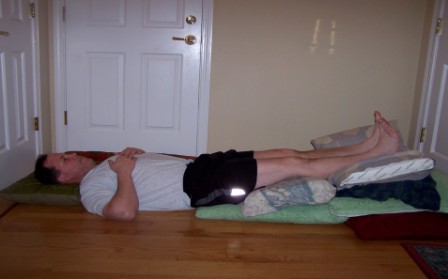
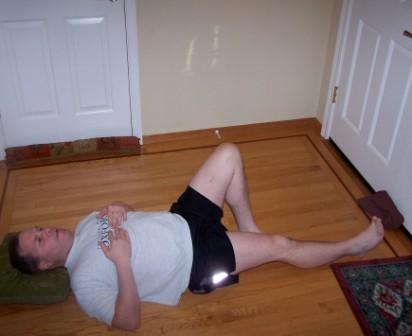
Hip Mobility
The following exercise will help improve the coordination of your hip movement. Lie on your back with the knee of your operative leg bent so your foot is next to the knee of the leg that is straight. Slowly drop the bent knee to the outside as far as you can. Try to make this a smooth motion. Now return the leg to the starting position again trying to make this motion as smooth as possible. You should move your leg slowly so that one repetition takes about 2 to 3 minutes. Repeat 5 times. Now move the foot of your bent knee about one foot away from the knee of the leg that is straight. Repeat the above movement trying to move the leg in a slow and smooth motion. Repeat 5 times.
Now move the foot of your bent knee across your opposite leg and let the footrest on the out side of your knee. Repeat the above motion 5 times
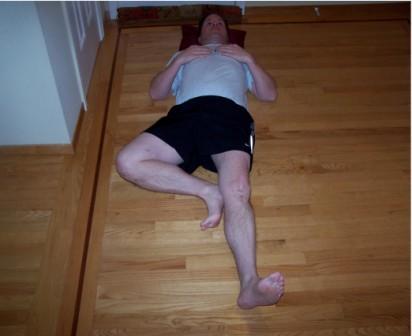
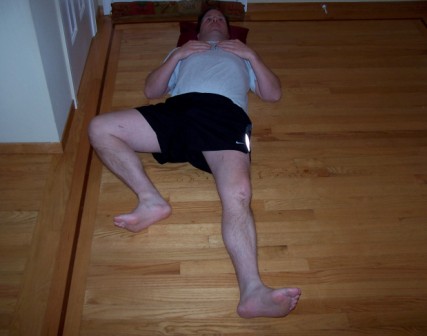
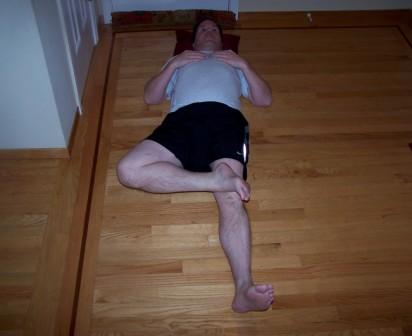
Position One Position Two Position Three
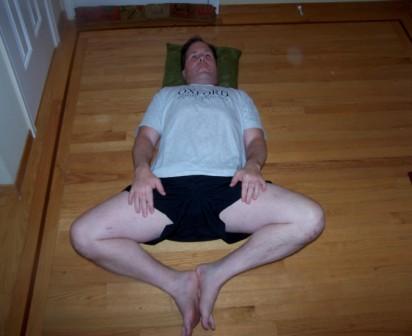
Motorboat
Lie on your back with your knees bent and your feet touching each other. Drop your knees apart and assess the mobility you have in your hips. Move your right knee toward the floor. Allow your left knee to move toward the right knee only when the tension in your groin muscles starts to pull the left leg over toward the right. Repeat this same process with the left knee moving toward the floor and the right knee moving toward the left. This is analogous to a boat pulling a water skier. The boat is one knee, the groin muscles are the rope and the opposite knee is the skier. Repeat this activity for 1 to 3 minutes being careful not to arch your back too much. You can put you feet closer or further away from your bottom to stretch different parts of your Pelvic Floor and groin muscles.
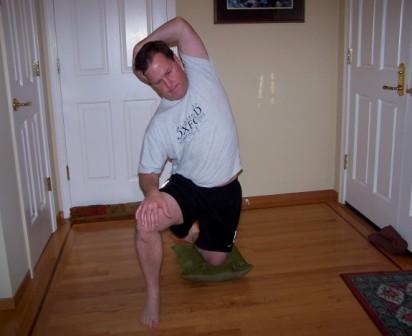
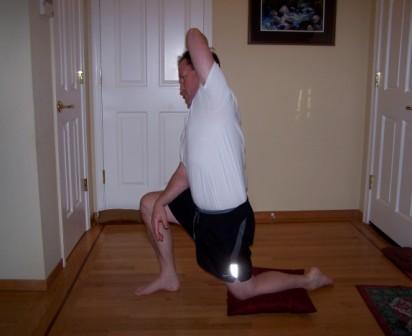
Psoas Stretch
Kneel on the knee of your operative hip. You may put your knee on a pillow if the pressure on your kneecap is too painful. Tilt your pelvis backwards to the “12 o’clock” position by tightening your bottom muscles. Raise the arm of the same side of your operative hip and grab your ear on the opposite side. Shift your weight forward on to your front foot. Side bend your body away from your operative hip. You should now feel a stretch in the front of your thigh and on the side of your trunk. Be sure to keep your bottom muscles tight when you do this stretch. Hold for 20 to 30 seconds.
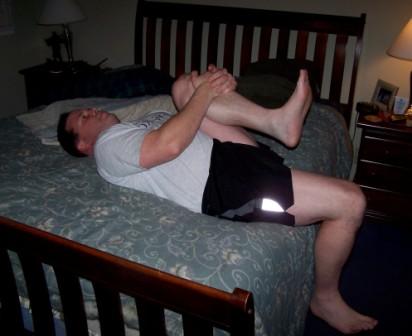
Modified Thomas Stretch
Lie on your back with your bottom right next to the foot of your bed. Pull the knee of the non-operative leg back toward your chest. This will flatten your back against the bed. Slowly lower the back of the thigh of your operative leg down toward the bed. Try to lower your thigh straight down and prevent your knee from going to the outside of your body. Now bend your knee to a 90 degree angle. You should feel a stretch in your thigh. You can also have someone lightly push your thigh down being careful not to let your low back rise up off the bed and cause you increase pain. Hold this stretch for 1 minute
Quadriceps Stretch in Standing
Bend the knee of the operative leg and put the foot on a chair. Tilt your pelvis backward to the “12 o’clock” position by tightening your bottom muscles. Now slowly bend the knee of the leg you are standing on while maintaining the 12 o’clock position in your pelvis and keeping the bent knee in a vertical plane. You should now feel a stretch in your thigh muscle. Hold for 20-30 seconds. You can facilitate further stretching by increasing the bend of the knee you are standing on or tilting your pelvis back further to the “12 o’clock” position.
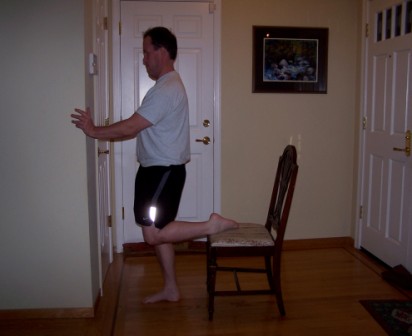

example of increasing the stretch
Heel Slides
This exercise is for elongating your Hip Flexor Muscles (ie.Psoas) while maintaining a stabilized spine. Lie on your back with your knees bent past 90 degrees and your feet on the floor. Tense the muscle in your Abdominal Wall by pressing you fingers into your abdomen just below your ribcage on both sides. Then push your fingers out by actively contracting your Abdominal Muscles. Repeat this process in the middle of your stomach and down by your waist. Now your Abdominal Wall should be tight like a sheet is when you stretch it out over a bed. Slide your heel out by straightening your knee. Keep your foot in contact with the surface you are lying on. Do not let your pelvis rotate forward or your low back arch by maintaining the tension in your Abdominal Wall. Repeat alternately with each leg 15-20 times.
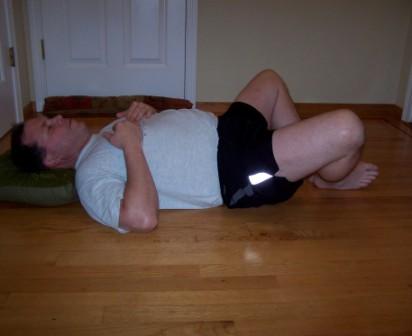
Hip Abduction with External Rotation
This exercise is like the “Motor Boat” exercise except the emphasis is on stabilizing your spine as you did in the Heel Slide Exercise. Repeat the same process of tightening your Abdominal Wall. Maintain your brace while you let both of your knees slowly fall to the outside. Do not let your pelvis roll forward or your low back arch. Repeat for 2 minutes.
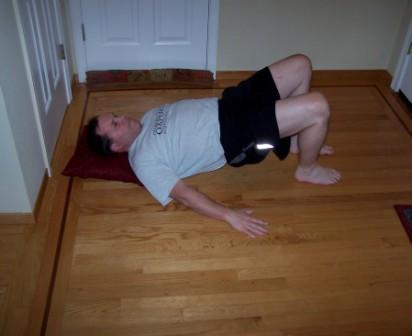
Bridging
Lie on your back with your knees bent. Tighten your bottom muscles and tilt your pelvis back to a “12 o’clock” position. Repeat the same process as above and tighten your Abdominal Wall. Now, tighten your pelvic floor by pretending to cut the flow of urine off. With your bottom, Abdominal Wall, and Pelvic Floor tight, lift your bottom up as high as you can without experiencing increased pain. Slowly count to ten. Now, slowly lower your bottom down and relax your muscles. Repeat this 10-15 times.
Therapist Note
I intentionally did not include the Straight Leg Raise exercise in this list. I feel this exercise is counterproductive in the Level One phase of rehabilitating a resurfaced hip. The Psoas, which is a primary hip flexor, is already in a hypertonic state. By performing a straight leg raise, you are activating the already tight Psoas and causing it to be even more dysfunctional. The Bridging, Heel slide, Modified Thomas Stretch, and Psoas stretch exercises all emphasize increasing the length of the Psoas. This is critical in improving the function of the Psoas and decreasing hip impingement pain.