Stretches for Hip Resurfacing Patients Post op
by Duncan Rinehart
Duncan was resurfaced by Dr. Vijay Bose in May 2008. He developed these stretches to help him regain balance and fine muscle control. He completed a sprint triathlon in the U.S. the end of July, just a couple of months after his hip resurfacing and in October he did a 10k in Casablanca in 56 minutes with no problems.
Here are his stretches that Dr. Bose recommended he share with the patient community.
All of the standing stretches (6 out of 7) start in the same position with the body's weight mostly on the resurfaced hip-leg. These are intended to be weight bearing stretches to increase muscle strength, control and to increase balance. Most of the stretches (5 standing and the one seated) are static - move into them hold at the point of good stretch for 5-10 seconds, then move back, repeat 3-10 times. You will know the one more dynamic stretch by the number of pictures that I send with it. Most of these are basically yoga stretches with a few modifications here and there.
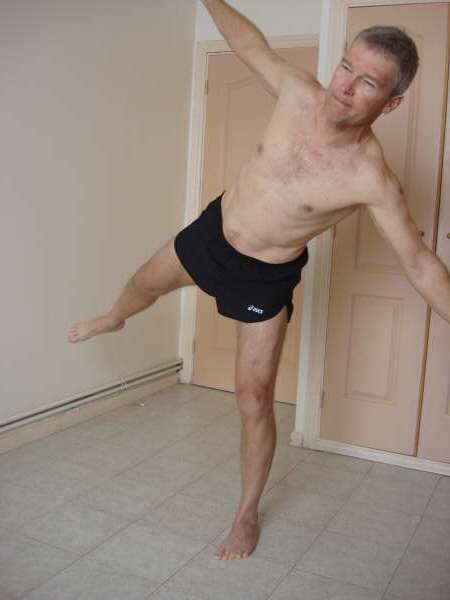
Stretch 1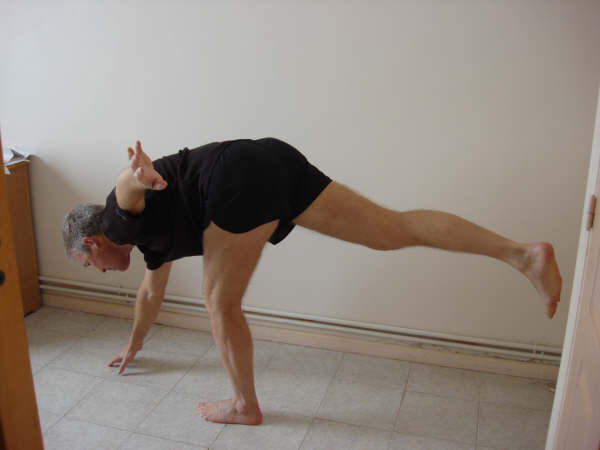
Stretch 1 starts in the standing position with all of the body's weight on the repaired side (my left side in the photos). Bend forward slowly, stretching your opposite arm toward a spot on the floor. Lift the "good side" foot and extend that leg behind you for balance.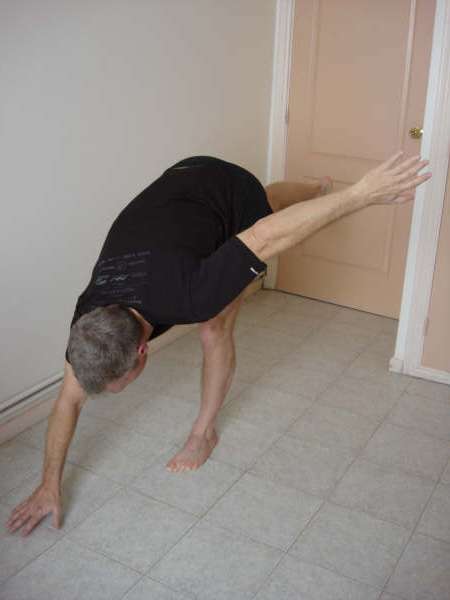 Extending the repaired side arm to the side helps with balance as well (see pictures). Hold the stretched position for 5-10 seconds then gradually come back up to the starting position. The muscles of your repaired hip will work a bit to get you back up. Bending your knee helps them. Doing the stretch near a wall, bed, chair or other sturdy object will allow you to grab it with your free-balance hand when you loose balance. With practice you will be able to do 10 of these without loosing balance. To build strength in your repaired hip, hold a small weight (a bottle of water might be good) in the hand that stretches to the floor. This increases the work your hip does to return you to standing.
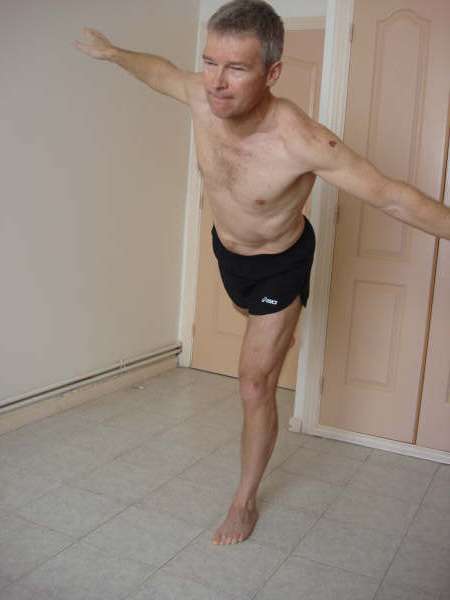
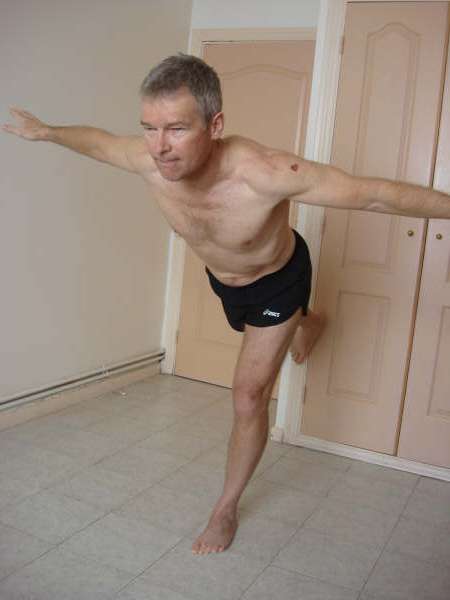
Stretch 2
This one is for the front of the hip - the muscles and tendons that pull your leg toward your chest.
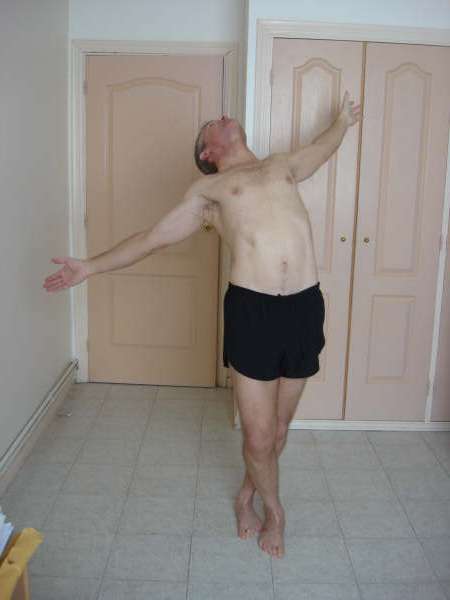

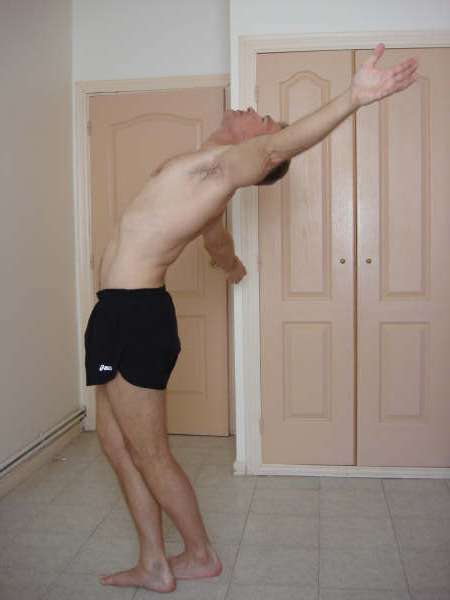 Start in the standing position with your weight mostly on your resurfaced leg (my left one in the pictures). Then cross your "good" leg in front placing that foot (my right foot) mostly on the floor outside of the other. This is for balance but it helps position the hips for the stretch too. Gradually stretch back as if you were going to swan-dive up to the sky. You should feel the stretch in the front of your resurfaced hip. Be sure to keep most of your weight on the resurfaced leg. Hold for 5 to 10 seconds then return to the start.
To rotate the stretch toward the outside a little, once you are in the lay-back stretch, twist your upper body so that your resurfaced-side arm and shoulder move up and back while your other arm and shoulder move down and forward slightly. You should feel the stretch move from stratight ahead (12:00 postion) to the outside (11:00 or 10:00 position). Hold for 5 to 10 seconds then return to the start the way you came, untwist then straighten up and stand normally.
Stretch 3
This stretch is for the inside of the resurfaced-side thigh.
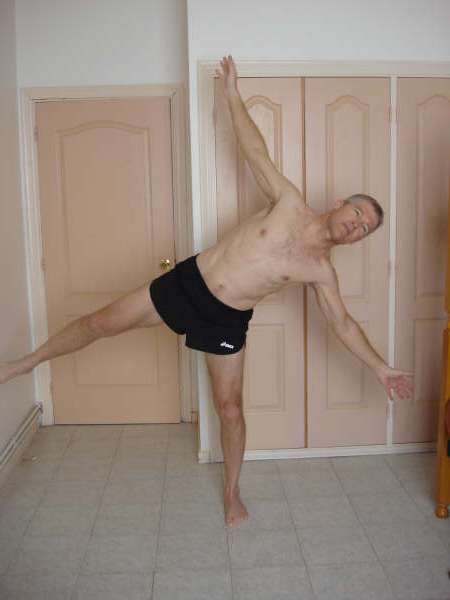
Stand with feet together and arms out to the side for balance. Bend sideways over your resurfaced hip, lifting your "good" leg in line with your leaning torso (see picture). go as deep into the stretch as is comfortable, hold for 5 to 10 seconds then return back to standing. Your resurfaced leg may have to work a bit to pull you back up out of the stretch. Having a sturdy object within reach can help if you loose balance. This stretch is common in gymnastics and in yoga.
Stretch 4
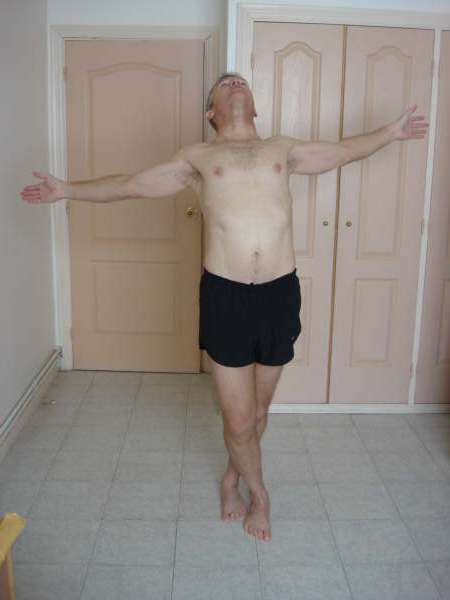
This is a more dynamic stretch that requires balance throughout and a little strength in spots. Begin the stretch with your weight on your resurfaced hip and your arms out to your sides for balance.

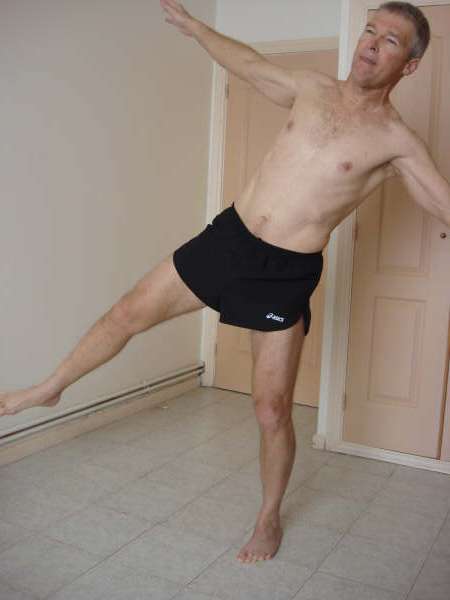
Lay back extending your "good" leg out in front (photo a). Try to keep it inline with your torso and your foot the same height off the floor as you rotate 180 degrees then back. In this lay back position, your shoulders and hips should be about parallel with the floor. Now rotate your raised leg slowly around to the side as your torso moves in the opposite direction over your resurfaced hip (photos b, c, d, e). As your raised leg moves out to the side, your shoulders and hips should be about perpendicular to the floor. Keep rotating over your resurfaced hip until your raised leg is extended to the rear 180 degrees from the start and your face and chest are facing the floor (photo f). At this point your shoulders and hips should be again parallel to the floor. When you reach this position, begin the return trip. When your raised leg is fully extended behind you, it will take some strength from your resurfaced hip muscles to begin rotating back (photo g). Try to keep your raised foot the same height above the floor and your torso in line with your raised leg as you rotate back 180 degrees to the start (photos h, i, j). Rotate slowly back to the lay back position then straighten up, relax and move around a bit before trying this one again. The movement is harder as you raise your free leg higher off the floor.
Stretch 5
Begin by standing with feet together near a door, bed or other stable object.
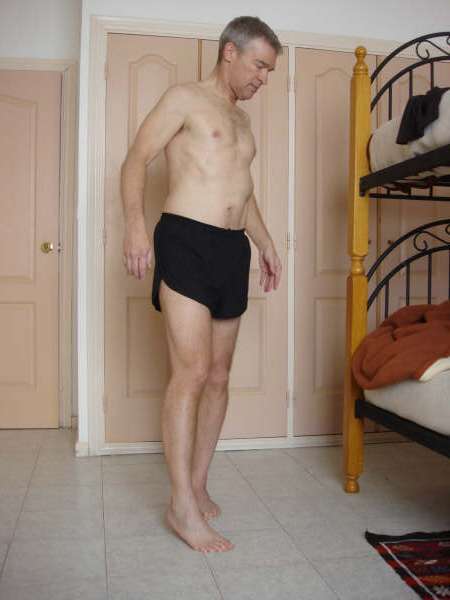
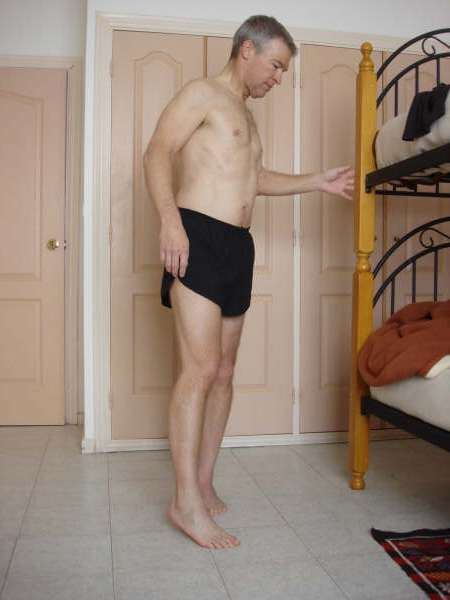
Shift your weight onto your resurfaced hip-leg. Hold your but muscles firm to keep your hip aligned. Then rotate forwards (see photos). To increase the stretch, use your free foot to push against the floor slightly, and your hand to pull against the door or bed. Hold the stretch for 10 seconds then return to the start. Repeat 10 times.
Stretch 6
Begin by standing with feet together near a door, bed or other stable object.

Shift your weight onto your resurfaced hip-leg. Hold your but muscles firm to keep your hip aligned. Then rotate backwards (see photos). To increase the stretch, use your free foot to push against the floor slightly, and your hand to pull against the door or bed. Hold the stretch for 10 seconds then return to the start. Repeat 10 times.
Stretch 7
Sitting on a firm chair or bed, place the resurfaced-side ankle on the other knee.
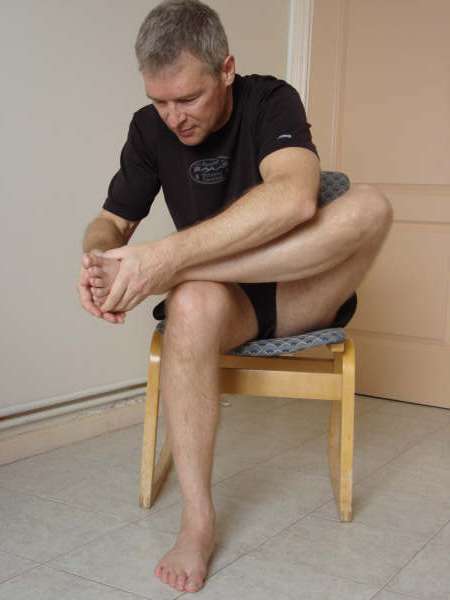
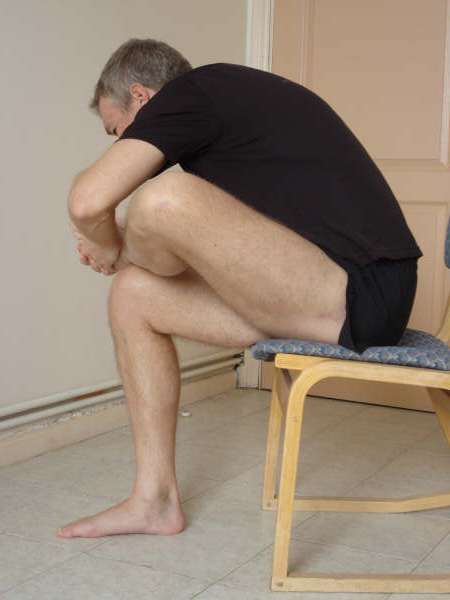
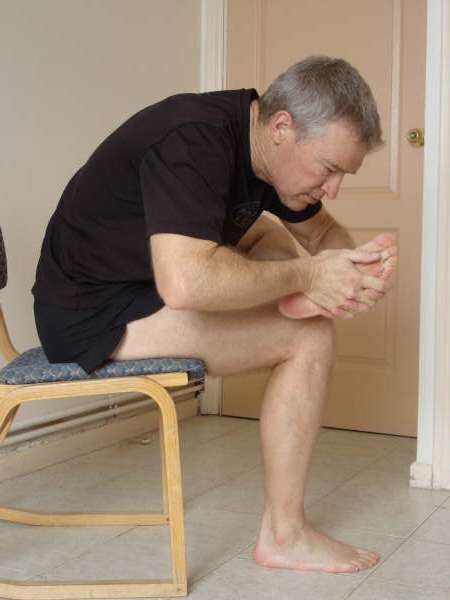
Gently lean forward. You should feel the stretch on the outside of the thigh and in the small of the but just behind the hip. To increase this stretch, pull on your foot (see photos) and stretch your nose toward your toes. Stretch to the point of tightness and hold this stretch for 15-30 seconds. Release then repeat 3-5 times. As you repeat, you should be able to go deeper into the stretch without trying harder.